Quick Start Guide
Setup on AWS, GCP, or OpenStack
Security Monkey can run on an Amazon EC2 (AWS) instance, Google Cloud Platform (GCP) instance (Google Cloud Platform), or OpenStack (public or private cloud) instance. The only real difference in the installation is the IAM configuration and the bringup of the Virtual Machine that runs Security Monkey.
GitHub Organization Monitoring
For monitoring GitHub, please read the GitHub monitoring documentation here.
IAM Permissions
Database
Security Monkey needs a postgres database. Select one of the following:
- Local Postgres (You’ll set this up later once you have an instance up.).
- Postgres on AWS RDS.
- Postgres on GCP’s Cloud SQL.
- Currently OpenStack utilizes a local postgres database.
Launch an Instance:
Install Security Monkey on your Instance
Installation Steps:
- Prerequisites
- Setup a local postgres server
- Clone security_monkey
- Compile (or Download) the web UI
- Review the config
Prerequisites
Create the logging folders:
sudo mkdir /var/log/security_monkey
sudo mkdir /var/www
sudo chown -R `whoami`:www-data /var/log/security_monkey/
sudo chown www-data /var/www
Let’s install the tools we need for Security Monkey:
sudo apt-get update
sudo apt-get -y install python-pip python-dev python-psycopg2 postgresql postgresql-contrib libpq-dev nginx supervisor git libffi-dev gcc python-virtualenv
Local Postgres
If you’re not ready to setup AWS RDS or Cloud SQL, follow these instructions to setup a local postgres DB.
Install Postgres:
sudo apt-get install postgresql postgresql-contrib
Configure the DB:
sudo -u postgres psql
CREATE DATABASE "secmonkey";
CREATE ROLE "securitymonkeyuser" LOGIN PASSWORD 'securitymonkeypassword';
CREATE SCHEMA secmonkey;
GRANT Usage, Create ON SCHEMA "secmonkey" TO "securitymonkeyuser";
set timezone TO 'GMT';
select now();
\q
Clone security_monkey
Releases are on the master branch and are updated about every three months. Bleeding edge features are on the develop branch.
cd /usr/local/src
sudo git clone --depth 1 --branch develop https://github.com/Netflix/security_monkey.git
sudo chown -R `whoami`:www-data /usr/local/src/security_monkey
cd security_monkey
virtualenv venv
source venv/bin/activate
pip install --upgrade setuptools
pip install --upgrade pip
pip install --upgrade urllib3[secure]   # to prevent InsecurePlatformWarning
pip install google-compute-engine  # Only required on GCP
pip install cloudaux\[gcp\]
pip install cloudaux\[openstack\]
python setup.py develop
🚨⚠️🥁🎺 ULTRA SUPER IMPORTANT SPECIAL NOTE PLEASE READ THIS 🎺🥁⚠️🚨
In the commands above, a Python virtual environment is created. ALL Security Monkey commands from this point forward MUST be done from within the virtual environment. If following the instructions above, you can get back into the virtual environment by running the following commands:
cd /usr/local/src/security_monkey
source venv/bin/activate
Compile (or Download) the web UI
If you’re using the stable (master) branch, you have the option of downloading the web UI instead of compiling it. Visit the latest release https://github.com/Netflix/security_monkey/releases/latest and download static.tar.gz.
If you’re using the bleeding edge (develop) branch, you will need to compile the web UI by following these instructions:
# Get the Google Linux package signing key.
$ curl https://dl-ssl.google.com/linux/linux_signing_key.pub | sudo apt-key add -

# Set up the location of the stable repository.
cd ~
curl https://storage.googleapis.com/download.dartlang.org/linux/debian/dart_stable.list > dart_stable.list
sudo mv dart_stable.list /etc/apt/sources.list.d/dart_stable.list
sudo apt-get update
sudo apt-get install -y dart

# Build the Web UI
cd /usr/local/src/security_monkey/dart
/usr/lib/dart/bin/pub get
/usr/lib/dart/bin/pub build

# Copy the compiled Web UI to the appropriate destination
sudo mkdir -p /usr/local/src/security_monkey/security_monkey/static/
sudo /bin/cp -R /usr/local/src/security_monkey/dart/build/web/* /usr/local/src/security_monkey/security_monkey/static/
sudo chgrp -R www-data /usr/local/src/security_monkey
Configure the Application
Security Monkey ships with a config for this quickstart guide called config.py. You can override this behavior by setting the SECURITY_MONKEY_SETTINGS environment variable.
Modify env-config/config.py:
FQDN: Add the IP or DNS entry of your instance.SQLALCHEMY_DATABASE_URI: This config assumes that you are using the local db option. If you setup AWS RDS or GCP Cloud SQL as your database, you will need to modify the SQLALCHEMY_DATABASE_URI to point to your DB.SECRET_KEY: Something random.SECURITY_PASSWORD_SALT: Something random.
For an explanation of the configuration options, see options.
Create the database tables:
Security Monkey uses Flask-Migrate (Alembic) to keep database tables up to date. To create the tables, run this command:
cd /usr/local/src/security_monkey/
monkey db upgrade
Populate Security Monkey with Accounts
Add Amazon Accounts (AWS ONLY)
If you don’t use AWS, you can skip this section.
Security Monkey has the ability to check which accounts are accessing your resources. This is helpful to detect if there is unknown cross-account access. In some cases, your items will be configured to permit Amazon owned accounts that provide specific AWS services, such as ELB access logging. Security Monkey is equipped with a command to automatically add these accounts to the database, which will prevent Security Monkey from raising an “unknown cross-account access” issue on a given item.
To add the “friendly” Amazon service accounts to Security Monkey, please run the command:
monkey amazon_accounts
Add Your AWS/GCP Accounts
You’ll need to add at least one account before starting the scheduler. It’s easiest to add them from the command line, but it can also be done through the web UI. :
monkey add_account_aws
usage: monkey add_account_aws [-h] -n NAME [--thirdparty] [--active]
                              [--notes NOTES] --id IDENTIFIER
                              [--update-existing]
                              [--canonical_id CANONICAL_ID]
                              [--s3_name S3_NAME] [--role_name ROLE_NAME]

monkey add_account_gcp
usage: monkey add_account_gcp [-h] -n NAME [--thirdparty] [--active]
                              [--notes NOTES] --id IDENTIFIER
                              [--update-existing] [--creds_file CREDS_FILE]

monkey add_account_openstack
usage: monkey add_account_openstack [-h] -n NAME [--thirdparty] [--active]
                              [--notes NOTES] --id IDENTIFIER
                              [--update-existing]
                              [--cloudsyaml_file CLOUDSYAML_FILE]
For clarity: the -n NAME refers to the name that you want Security Monkey to use to associate with the account.
A common example would be “test” for your testing AWS account or “prod” for your main production AWS account. These names are unique.
The --id IDENTIFIER is the back-end cloud service identifier for a given provider. For AWS, it’s the 12 digit account number,
and for GCP, it’s the project ID. For OpenStack, it’s the cloud configuration to load from the clouds.yaml file.
Syncing With SWAG
If you’re using SWAG. You can populate your database via the following command:
monkey sync_swag --owner <example-corp> --bucket-name <my-bucket> --bucket-prefix accounts.json --bucket-region us-east-1 -u
AWS Only: S3 Canonical IDs
If you are not using AWS, you can skip this section. If you are using AWS, you should run the command:
monkey fetch_aws_canonical_ids
usage: monkey fetch_aws_canonical_ids [-h] [--override OVERRIDE]

Adds S3 canonical IDs in for all AWS accounts in SM.

optional arguments:
  -h, --help           show this help message and exit
  --override OVERRIDE
AWS S3 has an ACL system that makes use of Canonical IDs. This is documented here. These IDs are not easy to find, but are very important for Security Monkey to know if an S3 bucket has unknown cross-account access. The above command is a convenience to automatically find those Canonical IDs and associate them with your account. It is highly recommended that you run this command after you add an AWS account.
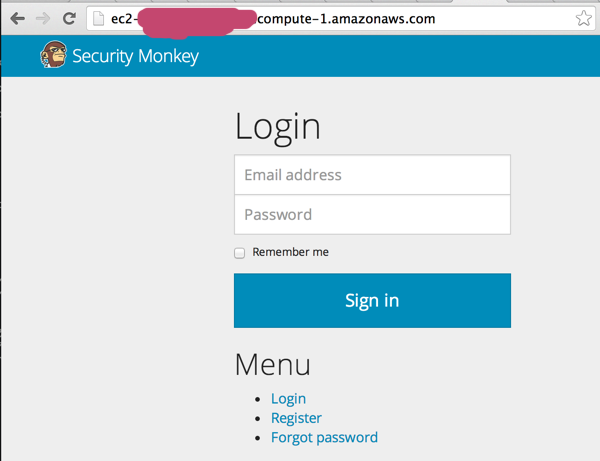
Create the first user:
Users can be created on the command line or by registering in the web UI:
$ monkey create_user "you@youremail.com" "Admin"
> Password:
> Confirm Password:
create_user takes two parameters:
- email address
- role (One of
[View, Comment, Justify, Admin])
Setting up Supervisor
Supervisor will auto-start security monkey and will auto-restart security monkey if it crashes.
Copy supervisor config:
sudo chgrp -R www-data /var/log/security_monkey
sudo cp /usr/local/src/security_monkey/supervisor/security_monkey.conf /etc/supervisor/conf.d/security_monkey.conf
sudo service supervisor restart
sudo supervisorctl status
Supervisor will attempt to start two python jobs and make sure they are running. The first job, securitymonkey, is gunicorn, which it launches by calling manage.py run_api_server.
The second job supervisor runs is the scheduler, which polls for changes.
You can track progress by tailing /var/log/security_monkey/securitymonkey.log.
Create an SSL Certificate
For this quickstart guide, we will use a self-signed SSL certificate. In production, you will want to use a certificate that has been signed by a trusted certificate authority.:
$ cd ~
There are some great instructions for generating a certificate on the Ubuntu website:
Ubuntu - Create a Self Signed SSL Certificate
The last commands you need to run from that tutorial are in the “Installing the Certificate” section:
sudo cp server.crt /etc/ssl/certs
sudo cp server.key /etc/ssl/private
Once you have finished the instructions at the link above, and these two files are in your /etc/ssl/certs and /etc/ssl/private, you are ready to move on in this guide.
Setup Nginx:
Security Monkey uses gunicorn to serve up content on its internal 127.0.0.1 address. For better performance, and to offload the work of serving static files, we wrap gunicorn with nginx. Nginx listens on 0.0.0.0 and proxies some connections to gunicorn for processing and serves up static files quickly.
securitymonkey.conf
Copy the config file into place:
sudo cp /usr/local/src/security_monkey/nginx/security_monkey.conf /etc/nginx/sites-available/security_monkey.conf
sudo ln -s /etc/nginx/sites-available/security_monkey.conf /etc/nginx/sites-enabled/security_monkey.conf
sudo rm /etc/nginx/sites-enabled/default
sudo service nginx restart
User Guide
See the User Guide for a walkthrough of the security_monkey features.
Contribute
It’s easy to extend security_monkey with new rules or new technologies. Please read our Contributing Documentation.